Friday, January 30, 2009

Not much to show on 40 & 42. sanding and more finish coats......

41 got the bridge glued in place.....

to do this I rough cut a nut, and then using a temporary tail piece I rig the bridge as a floating affair with just the farthest out two strings, and set it roughly in the right place by comparing the 12th fret harmonic with the fretted note in the same place. when they match, it's right!!

then cut round it with a scalpel and remove the finish. a few drops of glue and then all clamped up overnight.

Photobucket

Photobucket

Photobucket

next in line?

a pair of rosewood guitar shaped bouzoukis based on Stefan Sobell's design.

first project it onto a sceen and push the zoom til the dimensions are right, then draw round the outline & cut it out.

this will become the template to make the body mould.......

Photobucket

Photobucket

Thursday, January 29, 2009

mini dread has the tuners on and a bridge that I ventured into the dangerous world of CNC to create.......

Photobucket

Photobucket

Photobucket

the two As?

well #40 got the neck glued on, the heel cap on then a LOAD of sanding and a coat of finish......

Photobucket

Photobucket

and #42 got another few coats too.......

Photobucket

Photobucket

I'm REALLY looking forward to getting some strings on these three !!!

Tuesday, January 27, 2009

Neck joint cut on #40, but I couldn't get it glued in as one of my pupils pinched the last of my glue!! Hopefully I'll get the glue tonight and get it sorted tomorrow.

here it is along with the back of #42......

Photobucket

#41, the mini dread got sanded a lot today, (those kind of classes, kids working away, me sitting benevolently surveying them all with a mando on my knee, sanding away.........)

anyway, sanded and a first coat of lacquer on. this first coat is a great aid to spotting any otherwise invisible glue splodges which will be sanded out before the real finish coats go on. the fretboards are covered before finishing as these are oiled rather than varnished to allow them to breathe.

this is looking nice.......

Photobucket

Photobucket

Photobucket

And #42 got a LOAD of sanding too and it's first coat.......

I LOVE the way wood really comes alive with the lacquer...

Photobucket

Photobucket

Photobucket

Monday, January 26, 2009

a little bit of progress on all three mandos today.

the mini dread has the neck on and the heel plate glued in place, as does #42.......

once the glue has set I'll carve them both in to match the profile of the neck and then the LONG sanding process begins.

Photobucket

Photobucket

and I started the neck joint on #40, but ran out of time.... hopefully I'll get it done tomorrow. It looks a little rough at the moment but that'll tidy up!!

Photobucket

Friday, January 23, 2009

well I got the chisels sharpened this morning, so I was able to make a start of the neck mortice & tenon joints.

Easiest one first, the dread shaped one, with flat shoulders was the work of a few moments to get lined up and glued into place.

Photobucket

then I did some rough shaping to the backs of the other two necks, and got the join on #42 NEARLY done before I had to leave work to collect my no 2 child from Ju Jitsu.

the curved shoulders and fretboard extension make life a LOT more complicated than the guitar style joint as there are a load of different things going on... ah well, no disasters......

yet!!

Photobucket

The rough edge inside the joint will be hidden by a heel cap.

Photobucket

Photobucket

I'm looking forward to the possibility of maybe getting the first coat of finish on all three mandos by the end of next week.....

maybe!!

Thursday, January 22, 2009

frets and dots.......

mark and drill the holes with a brad point bit to get a flat bottomed hole, then glue in the Mother of pearl dots......
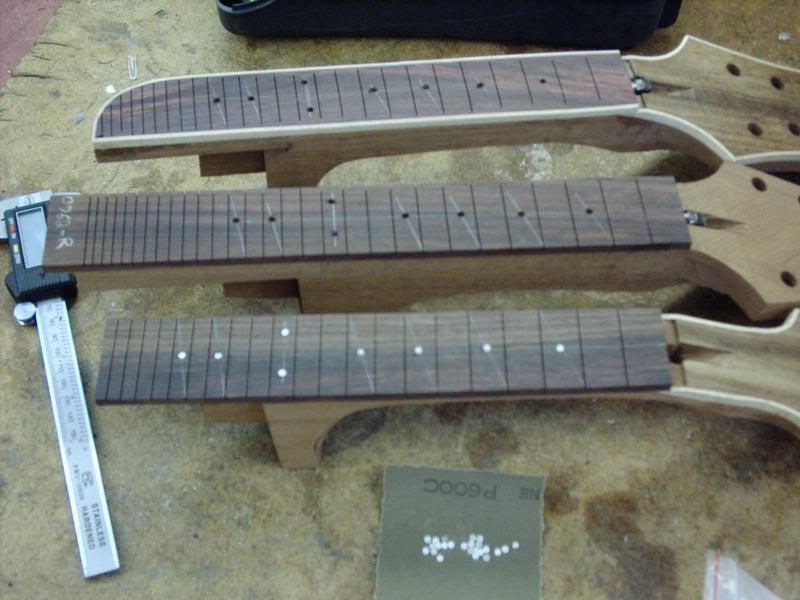
Photobucket

all done!!

Photobucket

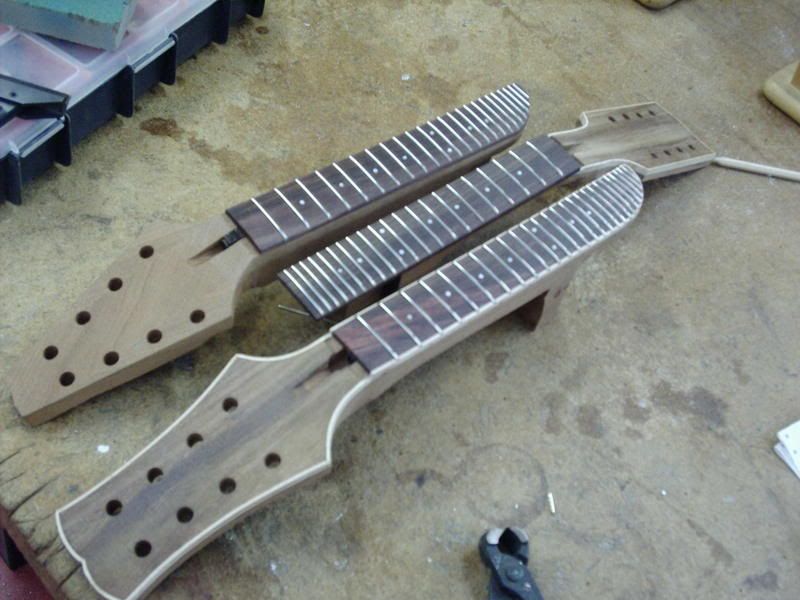
then fretting which is one of the most time consuming jobs in the whole build.

getting to this stage, before levelling and tidying the fret ends took about 2 hours......

that's half an hour each for the two unbound necks and a full hour for the bound one!! it takes ages to grind off that little tang underneath so it doesn't foul the binding. it's also very visually demanding. very close up concentration, so I'm ready for a lie down!!

Photobucket

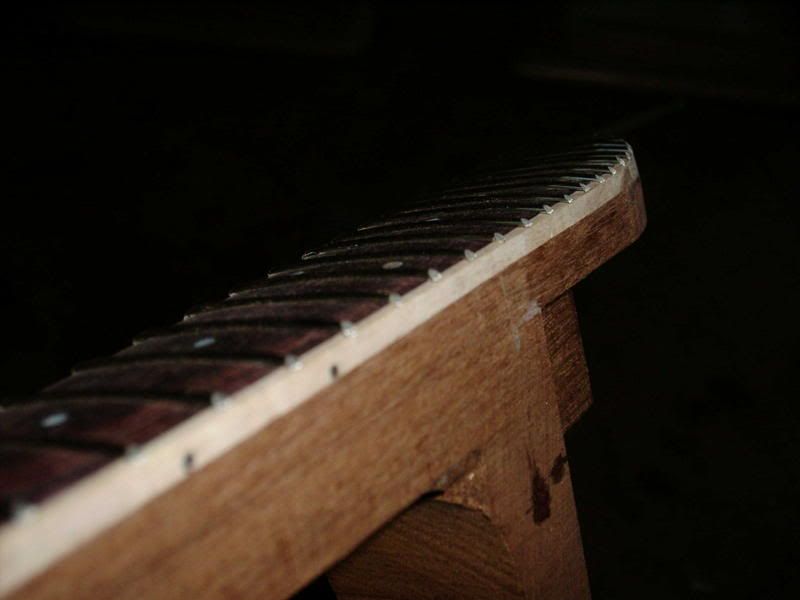
Edge dots on a rosewood fretboard are easy. I have a 2mm white plastic bar that will do the job nicely on #40 & 41. the maple bound fretboard on #42 throws up a whole different issue as the white won't show up and I don't have black.... so, a little lateral thinking and delving WAY back into memory comes up with.....

welding rod.

its copper coated so it'll never rust and the smooth sanded end will be varnished in. looks nice too.......

Photobucket

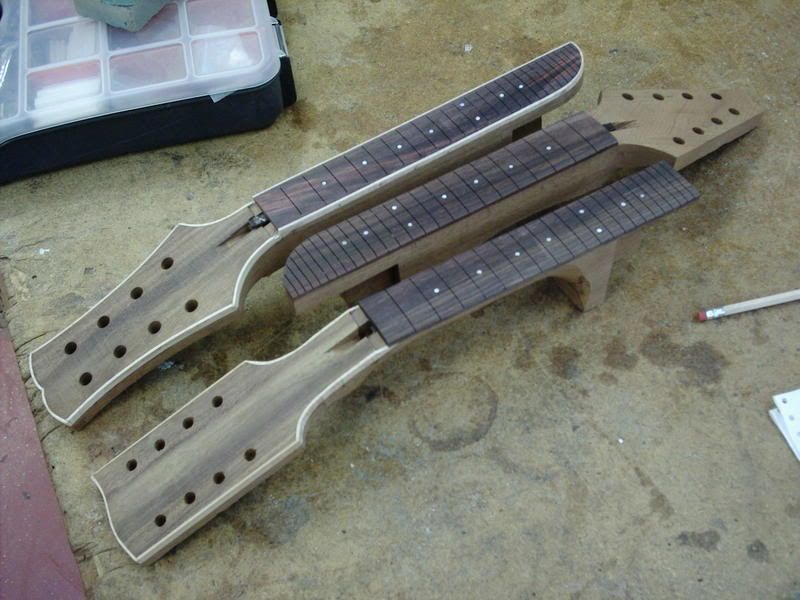
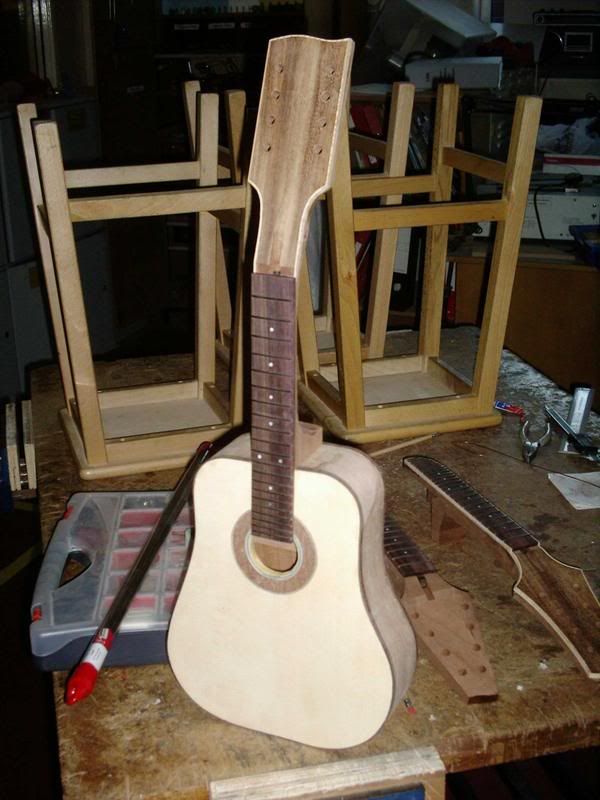
and no-where near ready to glue in, but starting to look like it might eventually be a real instrument......

maybe it's just me, but the head looks too long on this......

rather the nut to the headstock......

ah well, not the end of the world, it's not a commission!

Photobucket

so, still to do is the neck body joins on all three and shaping the necks on the two A styles. after that there's a LOAD of sanding to be done before the spray gun comes out......

then bridges, nuts, tuners & strings!!

Wednesday, January 21, 2009

Got a lot of bits & pieces done today.....

before work I cut the end of #42's fingerboard extension and routed the neck binding channel

Photobucket

maple strips will be glued in like this......

Photobucket

see?

Photobucket

tuner holes in #40......

Photobucket

started the neck mortices on two, but my chisels need sharpened so I'll leave that til the electricians have finished installing the new table saw in the store.....

rough carved the back of the neck of #41

Photobucket

and after school the bandages came off the bound neck on #42.....

I LOVE the way modern glues set so quickly!!

Photobucket

hopefully the sparks will be finished installing the saw tomorrow so I can get to the grinder to sharpen the chisels as I don't want to go near the neck joints with tools as blunt as my sense of humour!!

Tuesday, January 20, 2009

Mixed fortunes today.

I took the bandages off the two bound headstocks and they look GREAT!!

Photobucket

Photobucket

Bad news?

more bandages I'm afraid!

I was using a saf-t-planer to thin one of the headstocks and I nearly took my thumb off. OK, slight exaggeration, but half the nail is gone and there's a big flappy bit on top. luckily I didn't bleed on any of the wood.........

anyway,

Other things I limped through......

I got the fingerboard extensions on both the A necks......

Photobucket

and, after milling the truss rod slots....

Photobucket

I started glueing on the fretboards.

only enough clamps to do two at a time so I'll do the other one in the morning.......

Oh yes, and I drilled a tuner hole or 16.......

Photobucket

Photobucket

Monday, January 19, 2009

Neck time!!

So, if there's a new process to try out, don't try it on a commission, right?

I haven't bound a headstock before, so the dread shaped mando became the guinea pig......

glue on the rosewood head plate.....

Photobucket

then route & bind.....

Photobucket

tenons rough cut.....
Photobucket

OK, happy with that, lets have a go at the bound headstock on #42.....

route the channel.....

Photobucket

then bend & glue in the maple binding.

Photobucket

I ran out of batteries in the camera so I don't have an "all the bandages" pic, but trust me, it's done!!

Friday, January 16, 2009

Mando #40, 41 & 42.......

Along with the mahogany block that will soon be three necks

Photobucket

rough cut out with the "ears" glued on

Photobucket

and a couple of East Indian Rosewood face plates for the headstocks of 41 & 42

Photobucket

Blog Archive

About Me

Married with 4 kids, Christian, worship leader, luthier