Saturday, February 02, 2013

Making a nut for a guitar, mandolin, bouzouki etc

its easy, cheap, and contrary to popular belief you DO NOT NEED expensive tools.

a ruler, couple of pencils, a hacksaw blade and some sandpaper.

the following pics are taken from several different instruments, but they show the process!

click on a pic to enlarge.

cut & file it to the right length


then make a pencil like this......(I lean it onto the sander)


so that you can mark where the top of a zero fret WOULD be


then shape the top of the nut down to about 1.5mm above that line.


now mark where your slots will be.....


and cut them.  DON'T go down to the line.

I use a bandsaw for the initial cuts, but a hacksaw does the job just fine.

glue it in (a couple of drops of CA (superglue))

then string her up...

(the eagle eyed among you will spot that this is now a bouzouki & not the guitar that I started, but live with it, OK!!!!


the strings will be too high.

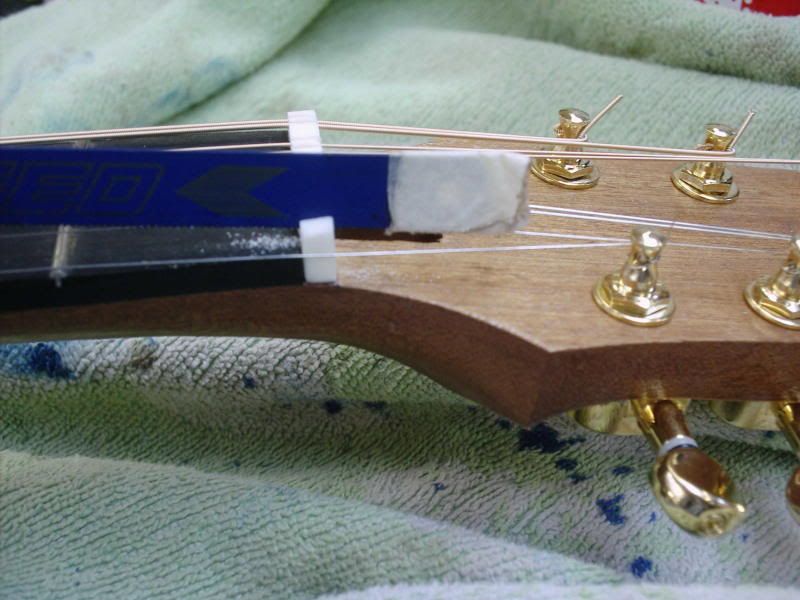
lift the strings out 1 at a time and use a saw blade, (or you COULD use a really expensive set of nut files) to bring the slot down to the desired height.  DON'T GO TOO LOW!!!!  Note the bit of tape to stop the saw marking the headstock.  DON'T ask why I found I needed to do this!!  The slots need to slope down away from the fretboard a little so that the highest point of the slot is where the string leaves the nut on it's long trip to the bridge.

finish the bottom of the slot with a cast off piece of wound string, just to buff it smooth.

job done!!


OK, OK, this is a third instrument, a mandolin!!

you WILL stab yourself at least 17 times on the sharp string ends doing this.

Oh yes.......

Making a bone saddle for an acoustic guitar

EVERYONE with an acoustic should have a bone nut & saddle, right?

all righty, first carve (or sand) the top of the saddle to the curve you want, about 1mm taller than you want (just copy the plastic one you're replacing.)


These pics are from a doubleneck 6/12 string guitar I built a while back......


click on the pics to enlarge.


I've just noticed that the string spacing in these pics is a hair off, its fine once things are straightened up and all is sorted.

string it up with the gauge of string you'll be using.....


Using an old string, make a temporary saddle and adjust it til the harmonic is the same note as the fretted 12 th fret note.

your ears may be good, but a good digital tuner is better!!  get a free download like AP tuner 3.06


mark on the soundhole side of the wire, repeat for each string.

shade everything on the soundhole side

file away all the pencil marked bone.  then file in from the back to make each individual string support a dome rather than a flat on top


string it up again and you're done.......

although you may want to lower the action a hair by sanding the BOTTOM of the saddle

the theory is simple.

Each string should be the scale length plus the diameter of the CORE.

on unwound strings the core is all there is, but on wound strings it's the steel bit up the middle.

making up the numbers it's roughly

.011
.016
.011
.016
.020
.028

which explains the b string wiggle.......

if you are fitting a piezo under the saddle then just sand the base to make the saddle shallower by the height of the piezo. 

personally, I'd always KEEP the original and make a new one, so I'd have the original if I ever removed the piezo again.

have fun!!

Blog Archive

About Me

Married with 4 kids, Christian, worship leader, luthier