Thursday, November 07, 2019

Home made piezo stompbox.

I was on holiday recently and the worship leader in the little church we went to had a commercially made stomp box.  It added to and filled out the sound nicely and I thought...... How hard can it be?

Well, not hard at all!

I had a rummage in my scraps box and got all the parts required to build this for free.  if you were BUYING the parts?  realistically, still under a fiver!

The case is a box that came with miniature bottles of port.  I took out the separators and cut the string handle.......


Now and first, I was going to go with three piezo discs because that's what I had.  Pointless, so I went with two.


In the end, I used two.  The biggest and smallest, passing the signal through a pot each, then to a shared jack.  Superglued the discs to the inside face of the box, and its done!


Honestly, no need at all for the pots.  The piezos could have easily been wired straight to the socket.

So now that the prototype works, I need to scavenge some nice hardwood!

Sunday, October 13, 2019

Tuners arrived, so, after another couple of coats of clear on the headstock....... here's what it will look like....


but, when I fitted the string guide, using the pre-existing hole, the screw snapped.


Oh.... dearie me!

so I tried to get a grip with pliers, but no luck, so the trusty Dremel took it down to below flush.

another screw will hold it......


Monday, September 30, 2019

Clamps off and much sanding to be done.........


Nowhere ready for a neck, but you have to look how things might turn out, right?


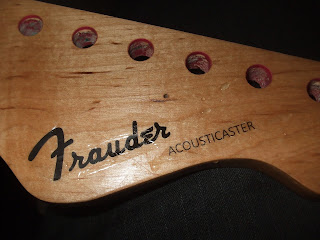
 Knackered holding the sander, so time for the headstock decal......

its NOT a Fender.......


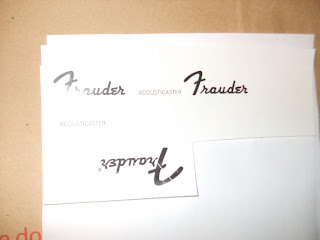
Print on paper to check sizes......


then onto waterslide paper......


and there we go!


As a kid making Airfix kits in the 70s, the idea that someday I would be making my own waterslide decals.....  Witchcraft!!!!

Friday, September 27, 2019

A full day off work with no other jobs on........

so, template marked onto the maple......


and then the maple cut out and tried for size......


Quick pass with the sander to get to over spill from the filler away....


and then rout out first to the depth of the maple


its not an airtight, perfect fit, which is fine.  there will be filler around the maple and then depending of if it works, either a sunburst leaving the centre of the maple clear, or if it turns out that a sunburst is beyond me (likely!) then solid colour covering the joins and filler.


and then bring it all down to the depth of the pickup routs, leaving a shelf all round for gluing.... and a pleasant surprise....  its not chipboard after all, what LOOKED like chipboard was the butchery done by a previous owner to fit the HB pickup.....


then glue and a bunch of clamps.


One wee thing...... On the net, I often see folks doing carpentry and guitar building indoors.

these folk are obviously single.

The mess produced by routing out this tiny space is spectacular!  definitely an outdoors job


Thursday, September 26, 2019

Headstock fully sanded out.......

Template made for the maple top.  It needs to cover all the existing routing, and not spill over any of the curved edges or the chamfered top edge....... And I've filled the screw holes.


Maple top now the glue is dry and the sanding starts to get the saw burn off.  maple is full of sugar (maple syrup, remember?) so it is really prone to blackening under sawing......

There is a nice bit of figure in this wood, so I MAY try a sunburst on this thing, leaving the centre of the top uncovered and the back, and edges black.  Maybe!


Sunday, September 22, 2019

OK, here we go again.....

New winter, new project.

Strat......

but acoustic.

loose the electrics and replace the scratchplate with a solid front and a regular acoustic bridge with a piezo underneath.

still plays like a strat, but sounds like an acoustic.

So start by buying an encore strat.  I LOVE encores.  I've had one since 1988 and I prefer the neck to anything squier have ever done, so it makes sense to start there.


Vile, isn't it!

well, it won't be pink for long......

A surprise when I dismantled it was the chipboard.


Routing will tell how much of this actually is chipboard as the neck pocket is real wood......


 lets release the grain from under that paint on the headstock.....  So far so good!

and I was pleasantly surprised to find that the neck was virtually untouched.  no fret wear at all.  One less job to do later.  Yay!


Now, discovering that there is chipboard in the body sets me off on another track.  I WAS going to put a spruce top on there, but now..... hardwood.  Gibson used maple on their acoustic Les Pauls and I have some maple in the shed.....

This was cut and stashed away with the intention to make mandolins some day in the future, so I'll be using this as the top......


tent and tape to glue the two bookmatched halves together....

LOTS of tape!


so, once the glue dries, the idea is to trim it to approximately this shape and recess it into the top (leaving room for the sloping top corner of course......


Blog Archive

About Me

Married with 4 kids, Christian, worship leader, luthier